Sunday, 10 September 2017

Assembly


Hey, this is the 6th update on my SolidWorks blog

This week was about learning how to use “Assembly” and a “Bill of Materials”.

I opened up my parts in the assembly after I created them and added copies of the parts to the assembly so that I could join them in different configurations by using “Mate” and different surfaces to “Mate” on.


I then went into the exploded view option so that I could drag parts from the assembly without losing their positon.


Last, I created a drawing of the exploded view but this time I inserted a bill of materials and used balloons to number match the corresponding parts to the bill.


Thank you for reading, until next time,
Deanna (design student)

2D Drawings


Hey, this is the 5th update on my SolidWorks blog

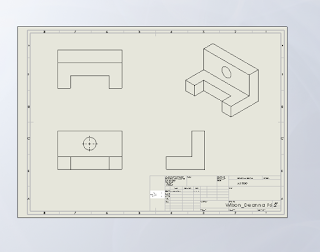
This week was about presenting CAD models as 2D drawings.

I started of with a standard title block and then edited it to contain my name and date. I also added in an extra column so that I could add in an image to show that my drawing will be in third angle projection.


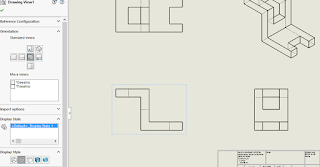
After drawing my parts, I opened them up in “Drawing”. I placed my part down and moved the mouse around to display the top view, front view, right side and the isometric view. I then played around with the setting and turned on the hidden lines    


Next, I did a section view of a rounded part because the top and side view look the same. Also, there were details in the middle that needed to be shown. I proceeded to experiment with the hatching by making them parallel and on 45 degree angles.


That’s it for this week, till next time,
Deanna (design student)

Revolt Boss, Extrude Boss, Extruded Cut, Loft Base and Swept Boss


Hey, this is my 4th update on my SolidWorks blog

This week I have learnt about “Revolt Boss” vs. “Extrude Boss”; “Extruded cut”; “Loft Base”; “Swept Boss” and how to create a “New Plane”. For once, I didn’t have any problems and didn’t get stuck on any of the exercises!

“Revolt Boss” is a pretty cool tool as you draw a section of your object around a centre line and when you click ok, it extrudes your sketch around the centre line.


To get the same part as I got with “Revolt Boss” by just extruding (with “Extrude Boss”) is a little bit more time consuming. This is because I ended up with more features in my tree; since I needed to create each different sized piece individually and extrude each one to the right length.


“Extruded cut” is just the reverse of “Extruded Boss”. I thought it was pretty self-explanatory, all I needed to do was draw the shape I wanted cut into/through my shape and it was done.


“Lofted Base” tied in with creating a new plane. “Lofted base” is simple, I just needed to create a shape on one of the planes and then make a new plane by going to: reference, geometry and then plane; and then putting how far you want the plane. On the new plane, I drew a circle and then ‘Lofted’ the two shapes on the different planes together.


“Swept Boss” required me to draw on two planes. One was to get the overall shape and the other was to determine what size/shape was to follow the first shape. This creating a bendy pipe.


Till next time,
Deanna (design student)